Showing posts with label DIY. Show all posts

Wednesday, April 30, 2014

DIY How to fix your broken nail with an ordinary tea bag


Ever had this problem? Trying to open the door, open a can of soda or in my case trying to open my washer. See, trying to do good deeds by doing some chores and then your nail breaks. UGH! This was not a tiny break, this was almost coming off my nail bed break.

I guess I have to fix it now or my thumb nail would look weird so short and the rest of my nails are pretty and long.


It's a good thing this happened at home and not somewhere, where I won't have my trusty Kiss nail glue and some good old tea bags laying around.


Well, first you need to clean your nails.


Grab your glue and a tea bag (empty the tea out first) then cut a piece of the bag to fit over your broken nail.


Normally I would use my Kiss  silk nail wrap, but I was out so this was the next best thing. It's just as sturdy and works just as great.


I cut up enough to cover my nail. Cover you nail with the glue and place the piece onto your nail. Push it with a stick to smooth it out or place a saran wrap (cling wrap / plastic) over and smooth it out without getting stuck to the glue. Let it dry.


Trim the edge or just use a nail file. Repeat the process if you want to double it, you can, but I only used 1 layer.


I buffed it until it's not as visible anymore then I coated it with another layer of glue and let it dry.


Buff lightly and it's all done. You can paint it after :-)


Tuesday, March 11, 2014

How to use your Donut Hair Bun - DIY


Over the years my hair has gotten thinner and I'm loosing tons of them every day. I've always had long hair, even when I was a kid and I love doing my hair. Then when I had kids I didn't have a lot of time doing fancy stuff to it so most of the time I just tie it in a ponytail and go on with my day.  

So when I saw a friend of mine and she had a bun on her head I asked her what it's called and so I went and bought myself a Conair Bun Maker Set.

It was easy to do and I love it. Keeps intact for the whole entire day and I don't have to worry about my hair getting in the way of my daily chores.

Hope the video helps you out a bit. There's no audio on my video (sorry).

Tuesday, September 10, 2013

DIY Easy way to HEM your jeans without cutting, but you can cut it LOL!


SHOUTOUT to all the shorties out there. Woop Woop! 

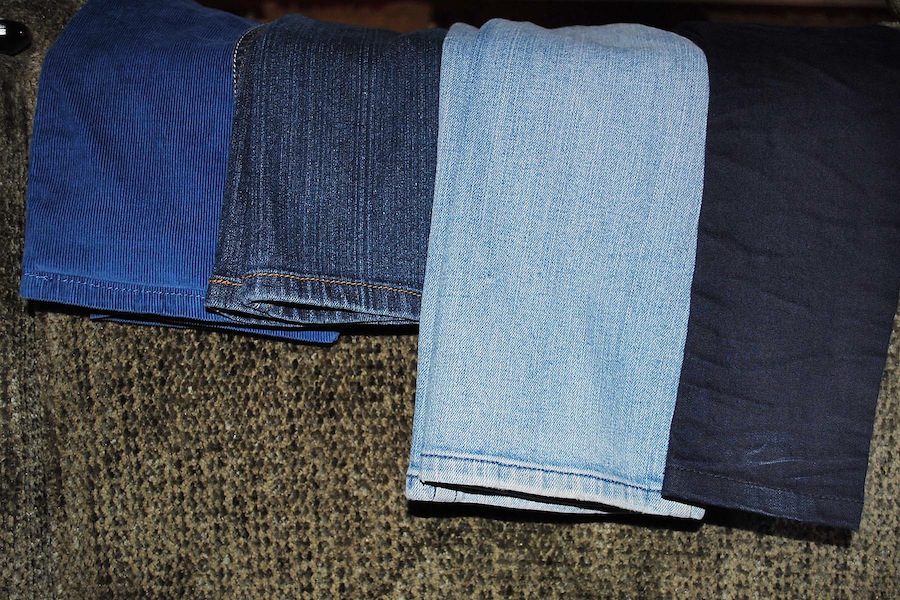
The reason why I hemmed 4 pants today was when my daughter came out of her room and she had this pants on and it looked like she had flippers / swim fins on. Yup! She looked like she was ready to go deep sea diving or something. So I told her to go change and I will fix her pants. She then gave me that, you better fix that today so I can wear it tomorrow instead look. 

Aaah pre-teen. 

Anyway, I had to use google and looked around for the easiest way to hem kids pants and I ended up at REFASHIONMAMA's site. This is her DIY for hemming jeans and I thank you for the tutorial. 

So here's what you do. Oh, before you do this. You might want to grab all the jeans you have that are long so you can do this all at ones. It took me less than 30 minutes to do 4 of my daughter's pants.


1. Measure where you want your pants to hit. Remember, if you like to wear heels to add extra on the bottom or you will end up with a capri. Which are pretty nice too. LOL!  I needed to take 3 1/2 inches off. I measured it before I made her change. ** Yah I know it says 4 inches but you're supposed to measure above the hem line.


2. Then you divide it in half (again, measure from above hem line and not the bottom of the hem) I wasn't paying attention with the photo and I apologize.  So in half and pin all the way around so that darn thing won't move on you. You really don't want to go out with a lopsided pants.


3. My sewing machine has one of those things in the middle, so when you have sleeves or for say jeans to sew you can just take it out and off you go. Pretty neat to me :-)


4. Make sure you pay attention to where your pins are and that your stitching lines match up. Now you start sewing.


5. Sew where the original hem is and just follow along until you get to the other side. Just make sure you backstitch in the end.  Then you're pretty much done at this point, if you want.


6. At this point you can either cut the extra off or leave it just in case your kid has a growth spurt in the next couple of months. 


7. Now you can turn the right side out and if you have an OCD like me you take your iron, even it out and press it flat.


8. See, all done :-)


The other 2 that needed to be hemmed.


This one I actually chopped the bottom part. I might need to get the serger out so it won't fray.

Thanks for stopping by. Hope this helped you out a bit. How about you? Do you buy jeans that are too long and end up folding them? UGH! I hate that. 


Saturday, September 7, 2013

Make your own Body Wash DIY


I love my body wash. I used to buy them left and right and just have tons of different kind of body wash in my bathroom cabinets. Then I noticed that the price is going up. Without coupon you could spend $4 to $6 for 1 bottle.


So when I found THIS RECIPE to make your own body wash at One Good Thing by Jillee, I knew I had to try it. I mean come on, she sold me when she mentioned it was cheaper. Yup! I am cheap thrifty, ok cheap. LOL!


SO here's what I did. Bought 2 bars of Dove soap, I couldn't find the 3 bars and I figured I would use the Lever 2000 I have at home. Which I did. Grated them, just as I would when I make my 
Homemade Laundry Soap. I keep all my soap making stuff in one spot so when I need it it's right there. Make sure these items you use for soap making are ONLY USED for just that. Don't be using them for your kitchen.  


6 cups of water and place on your soap pan on medium heat (not boiling) and keep and eye on the pot and stir occasionally until the soap is all dissolved.  I added a cup extra water because I used 1 different soap bar and I thought it would be thicker and it didn't get thicker. So next time I make it again I would stick to 6 cups.


You can let it cool in the pot for an hour before transferring or you can transfer it to a heat proof glass or jar or bowl.  It will thicken as it cools.


See, mine isn't as thick as I wanted but it still works great. Would I make it again? Absolutely!

This time though, I will use the 6 cups of water it called for. :-)


Thursday, September 5, 2013

Before and After room makeover FINALLY DONE!


I promise this is the last post about the room makeover. I've been shared a few because I'm just so proud of myself by doing it all by myself. I've never really done something like this before. well, I did before she was born, but I had help.

This is my project, all on my own. No help by anyone. My bestie did stop by to watch me paint. Even if she offered to help, I would have said no. LOL!


Dresser drawer bought at an auction for $7. Trust me this drawer was awful looking before I painted it that lilac color. I swear it has layers upon layers of gross paint and had to strip it. Replaced all the knobs and it was all good to go. 


Then I repainted it again when I did the makeover in my daughter's room. I wanted to do all white furnitures and instead of buying new ones that are up to your neck expensive, so I opted to paint instead. I would bet these cabinets we have are probably sturdier than the newer ones. I know her dresser is.


Now onto the desk. This was tough. It had the shiny shellac paint and stained pretty good. I had to use one of those sharp putty knife, the metal ones. That did the job scraping the top part, but I still had to sand the crap out of it.


I have to say it looked pretty good after a long process of scraping, sanding and wiping it all down.  It only took me about 2 or 3 coats to finish the desk. Paired it with a pretty and comfy chair from Target and it's all set. Link for the DESK Makeover.


Overall this is what her room looks like after it was all done. She has the biggest room in the house with the huge walk in closet, but that's another story :-)


As you can see, the bed is the only one that isn't painted white. The reason is:

1. I was pooped and didn't want to sand paper the crazy post.
2. It would have been a pain in the butt to scrape and sand it.
3. I thought I was going to buy her a new white bed, but she prefer this one.


Last, but not the least. 


I wanted something colorful in our hallway and something to add color to her room. So, I decided to paint it with chalkboard paint. Love it, love it, love it!!!


Don't forget to add me on Facebook, Twitter and Pinterest. 


Knock, knock? I painted her door with a chalkboard paint. Before & After makeover PART 4


Room makeover is almost done. This is the last post about the makeover. Actually, nope I lied. There will be another one but it will be to show the whole room.

This post is just to show you what I did with her boring door. It was covered with markers, pens, pencil writing and the stickers she placed on them when she was little.


First I took out the wooden board / stick that was attached to the door. It was easy to take out. Then I used the outline of the boards where to paint. didn't paint over it so I know where to put it back.


Sorry, I didn't get to take a picture while painting the blue paint without the board. I painted it and make sure I don't go over the line. 

I did 2 coats on the paint and it was perfect. We still haven't tried the chalkboard yet. I still haven't had the chance to buy some chalks. LOL!


Tuesday, September 3, 2013

I wish there was a song about KNOBS (Lexi's room makeover PART 3) DIY


This won't be a long post :-) I promise. Just to show you what and how I spray painted her dresser and desk knobs. 

I took a big box and poked holes on them so the screw would fit through the other end. Stick the knobs and then screw on the other side so they won't fall off. You don't have to screw it in all the way, just enough to hold the knobs.


See (below) I didn't spray paint the screws since it was on the inside part of the drawers.


Used Rust-oleum Satin Granite. Don't mind my hand covered in paint. LOL!


I think they're happy  and excited they're getting a fresh paint. Oh, I almost forgot. These knobs had a shiny finish to it so I sanded them first with a very fine sandpaper so the paint will stick to them better.


All done and painted. I left them on the box overnight since I was painting the dresser drawer and desk.


Share Away

You might also like

Related Posts with Thumbnails